We have a compost bin but we need more compost than it can make.
We’ve always wanted this heavy duty composter but it’s $257!!! So I did a little research and found that you can make you own compost tumbler very inexpensively!


My husband decided to make the holes in a row but you can make them randomly too.
Step 2 – After you have the holes drilled it’s time to fill it! That was easy wasn’t it!


“Brown” material is dried leaves, hay, sawdust from non treated lumber, shredded paper and wood chips. “Green” matter is grass clippings, kitchen scraps (not meat or dairy but veggies and fruit). You can also add coffee grounds and crushed egg shells. I won’t go into how compost happens (you can always google it on your own). Let’s just say that all this matter will decompose and turn into some wonderful stuff that’s essential for a good garden.
It’s a little tricky at first figuring out the percentage of brown to green but I’ve read that in a tumbler composter there should be more brown matter than green. So I’m trying that first and I’ll report back with the outcome.

Step 2 – Secure the top with bunji cords and start rolling. It needs to be rolled at least once a week. Which was me pushing it around the lawn with my feet.

Step 3 – You can then set your garbage can compost tumbler on some blocks so that it gets good air circulation and drainage but it’s not vital.

Step 4 – roll it around. The more the better! It’s a good workout!
I’ve read that there should be some usable compost in 3-4 weeks as long as you are consistent with rolling it – I’m sure you have to sift it like regular compost before using to get out the parts that haven’t broken down. I’ll keep you posted on how it works for us!
How to Build A Compost Tumbler with Supports
Πηγή: http://acultivatednest.com/2009/04/how-to-make-compost-tumbler-for-cheap/
We’ve always wanted this heavy duty composter but it’s $257!!! So I did a little research and found that you can make you own compost tumbler very inexpensively!

Out of an ordinary garbage can!
Compost tumblers are suppose to make compost much quicker than the bin method. I’ve never used this type of tumbler composter before so I’ll keep you informed about how effective it is. This is a tutorial for making a very inexpensive rolling compost tumbler. At the end of this post are some links for ones that are on stands.
Rolling Garbage can compost tumbler tutorial:
We just happened to have this blue garbage can that we weren’t using. You will also need either a drill or a large nail & hammer and bunji cords.
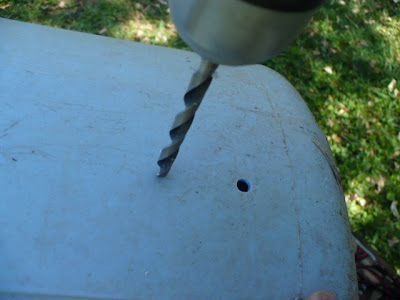
Step 1 – you will either drill holes all over the garbage can including a few in the bottom so that it can drain or use a very large nail and hammer and puncture holes in the can.
The drill was very fast and easy. If you decided to go with large but fewer holes, you will have to adhere some screening over the holes to keep the compost in and “critters” out. That’s why I went with the smaller holes, but it’s up to you.
My husband decided to make the holes in a row but you can make them randomly too.
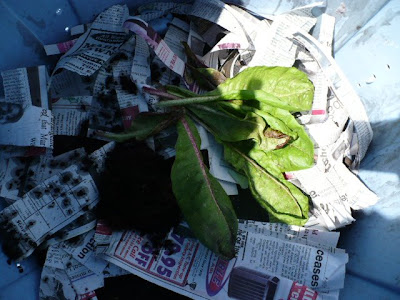
Step 2 – After you have the holes drilled it’s time to fill it! That was easy wasn’t it!

Compost Recipe for Your Tumbler – Layering your compostible material
Normally you want a combination of “brown” and “green” material. We started with putting some of our compost on the bottom because it’s nice and wormy but you can also just add some top soil or store bought compost. Then you start layering. Brown, green, brown, green. Finish off with a sprinkle of water wetting it all down. I think in a tumbler it’s best to keep to to things that you can shred before adding. Things like sticks take a while to break down.
“Brown” material is dried leaves, hay, sawdust from non treated lumber, shredded paper and wood chips. “Green” matter is grass clippings, kitchen scraps (not meat or dairy but veggies and fruit). You can also add coffee grounds and crushed egg shells. I won’t go into how compost happens (you can always google it on your own). Let’s just say that all this matter will decompose and turn into some wonderful stuff that’s essential for a good garden.
It’s a little tricky at first figuring out the percentage of brown to green but I’ve read that in a tumbler composter there should be more brown matter than green. So I’m trying that first and I’ll report back with the outcome.

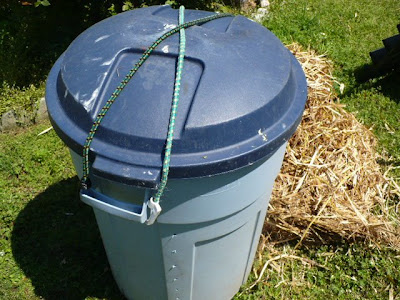
Step 2 – Secure the top with bunji cords and start rolling. It needs to be rolled at least once a week. Which was me pushing it around the lawn with my feet.

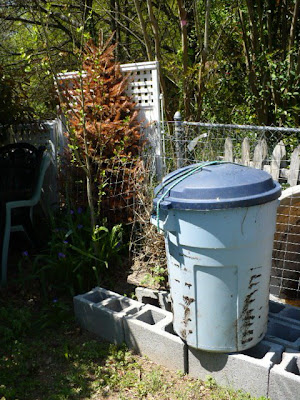
Step 3 – You can then set your garbage can compost tumbler on some blocks so that it gets good air circulation and drainage but it’s not vital.

Step 4 – roll it around. The more the better! It’s a good workout!
I’ve read that there should be some usable compost in 3-4 weeks as long as you are consistent with rolling it – I’m sure you have to sift it like regular compost before using to get out the parts that haven’t broken down. I’ll keep you posted on how it works for us!
Here are some other links for info about compost tumblers:
Build a Compost Tumbler YouTube VideoHow to Build A Compost Tumbler with Supports
You might also be interested in my Gardening 101 series
start here The Basics of Planning Your Vegetable GardenΠηγή: http://acultivatednest.com/2009/04/how-to-make-compost-tumbler-for-cheap/

Δεν υπάρχουν σχόλια:
Δημοσίευση σχολίου